grok
How to Create Consistent AI Characters with Grok Imagine (Step-by-Step Tutorial)
A hands-on guide to building a consistent AI master character and generating lip-synced spokesperson videos using Grok Imagine and CapCut without high subscription fees.
Most AI video tools can generate a talking head, but they fall apart the moment you need the same face in the next shot. The character drifts. The lighting changes. The background morphs. By clip three, you are looking at a completely different person.
Grok Imagine fixes this with a simple image-to-video pipeline. You build one master character image, upload it as a reference, and generate as many clips as you need. The face, outfit, and background stay locked. The only thing that changes is the lip sync and the subtle motion.
In this tutorial, I will walk you through the exact workflow I use to turn a single character image into a fully edited spokesperson video. We will cover prompt templates, scene timing, CapCut editing tricks to hide the rough edges, and the one Grok feature you should absolutely avoid.
What You Need
Two tools. That is it.
Grok Imagine is the engine. You can test a few generations on a free account, but the limits are tight enough that you will not get far. If you want to follow this workflow without hitting a wall, sign up for the SuperGrok trial at grok.com. Grok does not run an affiliate program, so this is a direct signup. The trial lasts three days, though you will need to enter payment details upfront to prevent spam abuse. After the trial, SuperGrok runs about thirty dollars a month. There is a heavier tier called SuperGrok Heavy with a six-month plan, but it is only available if you already have SuperGrok. For spokesperson videos, regular SuperGrok is plenty.
CapCut is the editor. It is free on desktop and mobile. If it is your first install, my invite link gets you a week of CapCut Pro, which adds extra transitions and export settings. You can do the whole edit on the free tier, but the Pro perks are worth using during the trial.
Your script can be anything. Write it yourself, or ask Grok to draft one for you. The only rule is that you need to split it into scenes before you start generating clips.
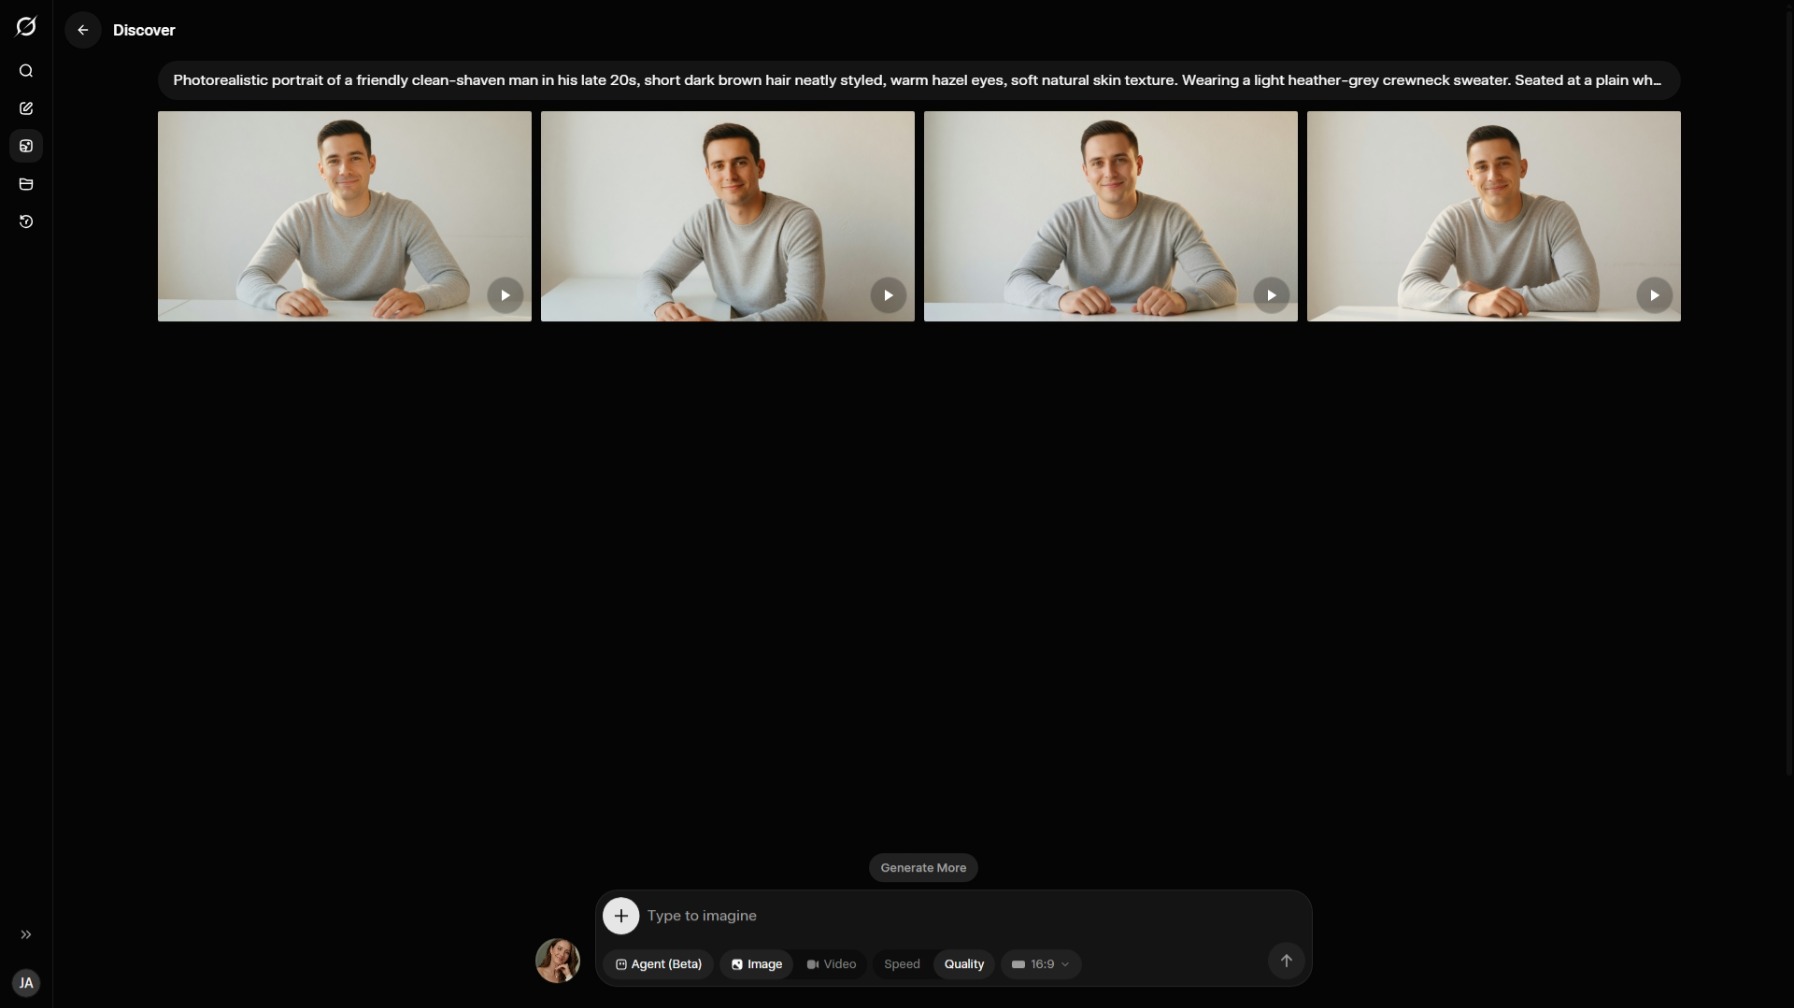
Step 1: Build Your Master Character Image
This image is the foundation of everything. You will upload it to every single video generation, so it is worth spending time here.
Open Grok Imagine and switch to Image mode. Copy the template below, fill in the bracketed fields, and paste it into the prompt box.
A photorealistic portrait of [AGE + GENDER + LOOK], wearing [OUTFIT]. [POSE].

Background: [BACKGROUND: keep it clean, e.g., a plain off-white wall, smooth, evenly lit, no posters, no shelves, no decor, no props].

Lighting: [LIGHTING: keep it simple, e.g., soft natural daylight from the front-left, gentle rim light on the right side of the face, no harsh shadows].

Framing: mid-torso up, centered, sharp focus on the face, shallow depth of field, cinematic color grading. Professional spokesperson headshot. [ASPECT RATIO].
A few tips on filling this out. Keep the background simple. A plain wall or a soft gradient is ideal. Busy backgrounds introduce objects that Grok might hallucinate or shift between clips. Keep the lighting directional but gentle. Harsh shadows create contrast that the video model can misread. Frame from the mid-torso up so the character has room for natural hand gestures without cropping.
Pick your aspect ratio based on where the video will live. I shoot mine at 16:9 for landscape YouTube videos. If you are making Shorts or Reels, switch to 9:16.
Hit generate. Grok returns four images at once. Pick the one that feels right. If none of them look like your character, do not just mash the generate button again. Go back and tweak the prompt. Change the outfit, adjust the lighting description, or specify the expression more tightly. The goal is to get the reference image right once, because every clip inherits its flaws.
Step 2: Script and Scene Timing
Here is the constraint that shapes your entire script. Grok Imagine only generates video clips in two fixed durations: six seconds or ten seconds.
Based on my tests, a six-second clip comfortably holds around eighteen to twenty words. The ten-second option accommodates roughly twenty-five to thirty-five words. Think of these as guidelines rather than strict rules. The actual pacing depends on how quickly you want your character to speak. However, attempting to squeeze forty words into a six-second clip will make the lip sync feel rushed and unnatural.
That means you need to break your script into scenes before you open Grok. Each scene maps to one clip. If a scene runs under twenty-five words, assign it six seconds. If it lands between twenty-five and thirty-five, give it ten.
A two-column list keeps this organized as you work through the script: the line, and the clip length it maps to.
| Line length | Clip |
|---|---|
| Under 25 words | 6 seconds |
| 25 to 35 words | 10 seconds |
This step feels like overhead, but it saves you from burning generations on clips that are too short or too long. Each generation uses your daily limit, so planning is cheaper than re-rolling.
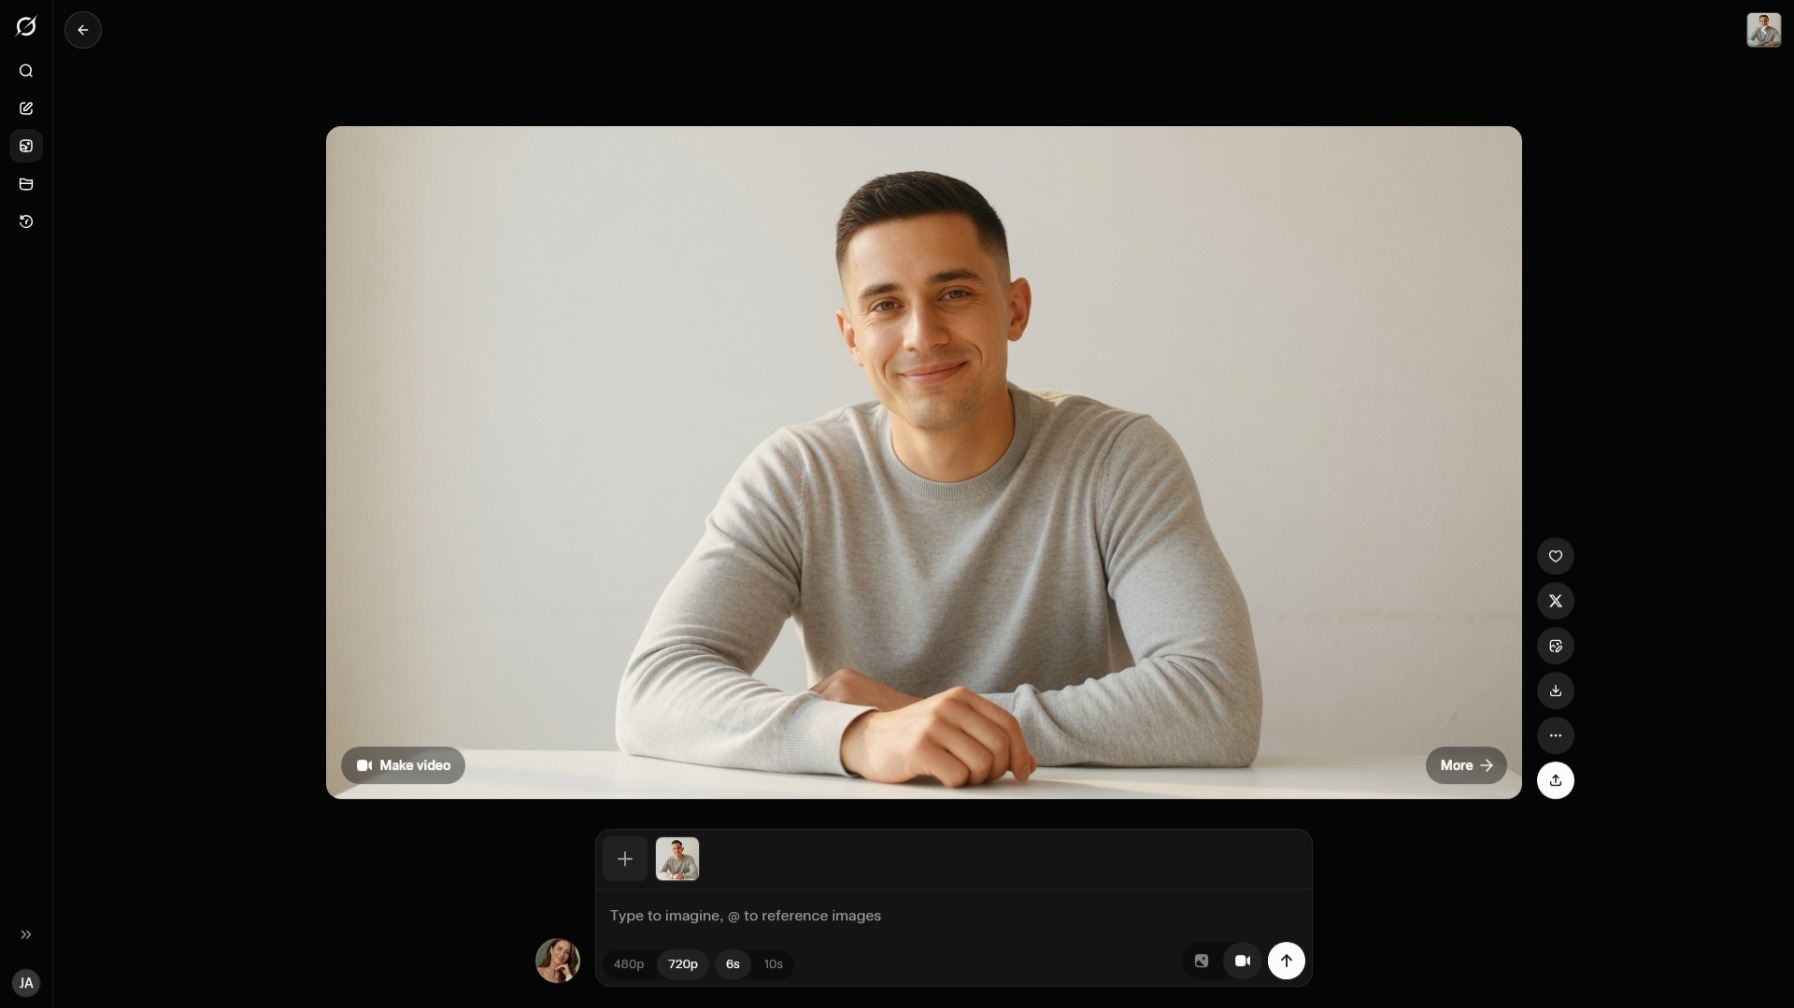
Step 3: Generate Lip-Synced Clips
Switch Grok Imagine to Video mode and upload your master character image. Before you type a prompt, you have two technical choices to make.
Resolution: 480p or 720p. If your character fills the entire frame, like a direct-to-camera spokesperson shot, use 720p. The extra resolution matters when the face is large. If you are compositing the character into the corner of a screen recording or a wider scene, 480p is fine. At small scale, the difference is invisible, and the generation is faster.
Duration: six or ten seconds, matching the scene you planned in the previous step.
Now for the prompt. Craft it yourself using straightforward language. Avoid copying prompts written by other AI models, as they often include unnecessary adjectives and complex formatting that Grok processes less effectively than clear, simple instructions.
Use this template for every clip:
The person in the reference image speaks directly to the camera. Keep pose, outfit, background, and lighting identical to the reference. Static camera, no zoom.

Mood: {{MOOD}}.
Motion: subtle natural movement only. Soft blinks, small head tilts, {{GESTURE}}.

Accurate lip sync, natural breathing pauses, calm conversational pace.

Line: {{LINE}}
Fill in the three placeholders. Mood sets the emotional tone. Motion describes a small gesture that matches the line. Line is the exact words you want lip-synced.
Here is an example for a six-scene script:
Scene 1: Hook
- Mood: warm, confident, inviting
- Gesture: small open-hand gesture toward camera on "closely"
- Line: "Most AI video tools can generate a talking head."
Scene 2: Benefits
- Mood: calm, relaxed, explanatory
- Gesture: small open-palm beats per item, soft nods between phrases
- Line: "But they fall apart the moment you need the same face in the next shot."
Scene 3: Audience
- Mood: warm, inclusive, decisive at the end
- Gesture: gentle hand sweep on "changes how you make content," firm nod on "Forever"
- Line: "This workflow changes how you make content. Forever."
Scene 4: Walkthrough
- Mood: focused, instructive, steady eye contact
- Gesture: subtle finger counting for the three items
- Line: "Here is the exact setup I use, step by step."
Scene 5: Conviction
- Mood: confident, slightly intense, softens at the end
- Gesture: small head shake on "isn't coming," decisive nod on "already here"
- Line: "The future of solo video isn't coming. It is already here."
Scene 6: CTA
- Mood: high-energy, bright, magnetic
- Gesture: small point to camera on "Hit subscribe," slight lean-in on "right now"
- Line: "Hit subscribe and follow the build right now."
Before generating, review your prompt carefully to ensure it conveys exactly what you intend. Each clip generation consumes part of your daily allowance, so aiming for success on the first attempt saves your credits. If the output isn't right, don't simply regenerate. Analyze what went wrong. Was the gesture too exaggerated? Did the mood not match? Was the line misinterpreted? Adjust that specific element in your prompt before trying again. This targeted approach preserves far more credits than indiscriminate re-rolling.
Do not use Grok's extend-video feature. I tested it, and the lip sync falls apart on the extended portion. The audio drifts, the mouth movements stop matching the words, and you end up having to redo the audio yourself in post. Keep your clips at six or ten seconds and move on.
Step 4: Edit in CapCut
Import all your generated clips into CapCut and arrange them sequentially on the timeline. Play through the sequence, and you'll likely observe an immediate issue. At each edit point, the character abruptly returns to the identical starting position. This occurs because every clip originates from the same master reference image. While the motion and lip sync differ between clips, the initial frame remains consistent across all of them.
There are two clean ways to hide this.
Option one: transitions. This is the easiest fix. CapCut has plenty of transitions in the free library, and the Pro tier adds extras like whip pans, light flashes, and glitch effects. Those are nice to have but not required. Pick one style and use it on every cut. Keep the duration short, around 0.2 seconds. While the transition plays, the viewer's attention is on the motion, and the pose reset underneath becomes invisible. In my experience, this fixes about ninety percent of the problem on its own.
Option two: cutaways. Do not show the character back-to-back. While they are talking, cut to a screenshot, a screen recording, a text card, or any B-roll that fits the line. The character's audio continues underneath, but the viewer is looking at something else. By the time you cut back to the character, the pose reset has already happened off-screen.
The best results come from combining both. Use a short transition on every cut, and insert cutaways wherever the script naturally allows for a visual demonstration. This keeps the video dynamic and hides the limitation completely.
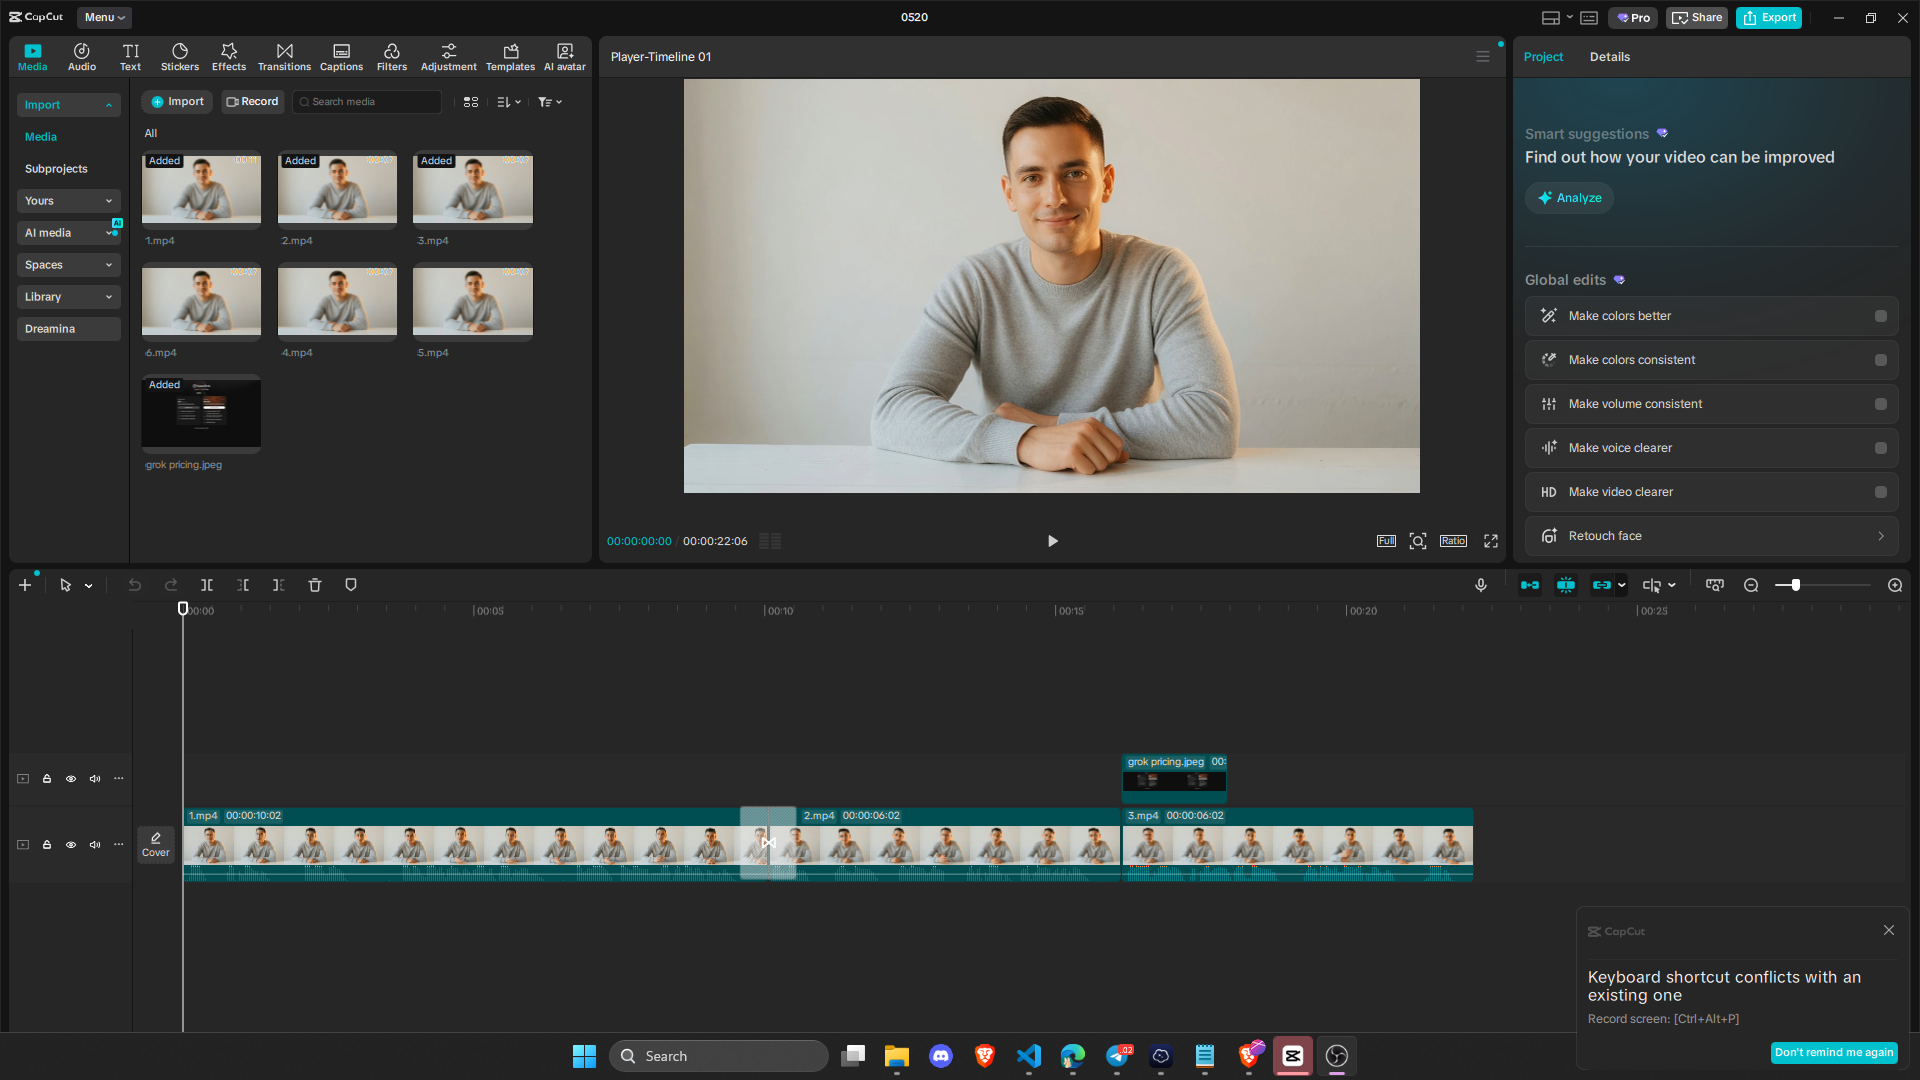
Other than the pose reset, there is not much to fix. Grok handles the lip sync and the character consistency for you. Your job in the edit is to make the cuts feel intentional, not like you are covering up a bug.
Step 5: Polish and Export
The finishing touches are quick.
Turn on auto-captions. CapCut generates them in one click, and they are accurate enough that I rarely need more than a few manual corrections. Captions are not optional if you want retention. Most viewers watch without sound, especially on mobile.
Add an end card with a subscribe prompt. Keep it simple. A solid background, your channel name, and a clear call to action. Drop it on the timeline after the last clip.
Export at 1080p. If you have CapCut Pro, bump the frame rate to 60 FPS. The motion from Grok's subtle head tilts and gestures feels noticeably smoother at sixty frames per second. If you are on the free tier, 30 FPS is fine, but 60 is worth it when you have the option.
What I Would Change
This workflow is solid, but it is not perfect.
The biggest limitation is the six and ten-second cap. If you have a long, uninterrupted monologue, you end up with a lot of clips and a lot of cuts. The transitions help, but there is only so much you can do before the editing starts to feel busy. For long-form content, I would still prefer a real human on camera.
The pose reset is manageable with transitions and cutaways, but it is still a workaround. If Grok ever adds a way to seed motion from the end of the previous clip instead of the master image, this entire section of the tutorial becomes unnecessary. Until then, plan your edit around it.
Finally, the daily generation limit on SuperGrok means you need to batch your work. I usually write and plan all my scenes one day, then generate and edit the next. Trying to script, generate, and edit in one sitting is possible, but one failed generation can throw off your timeline if you hit the limit.
The Result
One master image. A split script. A handful of generated clips. A clean edit.
That is the entire pipeline. The character looks the same in every shot. The lip sync matches the audio. The background never drifts. And you did not need a camera, a studio, or an actor.
If you build something with this workflow, I would love to see it. Follow along on X for future builds. I am documenting the tools, the workflows, and the honest failures as I go.
Resources